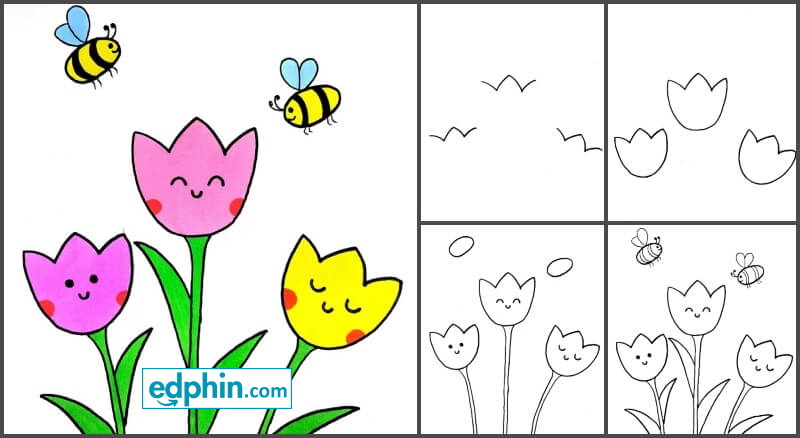
Today we will learn to make a tulip step by step. It is very easy to make. So let’s start:-

Materials Required for this Drawing
- Pencil
- Water Colors
- Sketch pen
Step by Step Tutorial

- For this we need paper, HB pen, and some colors. We will use colors keeping in mind the safety of children, so we will use pencil color and will make it together with our parents.
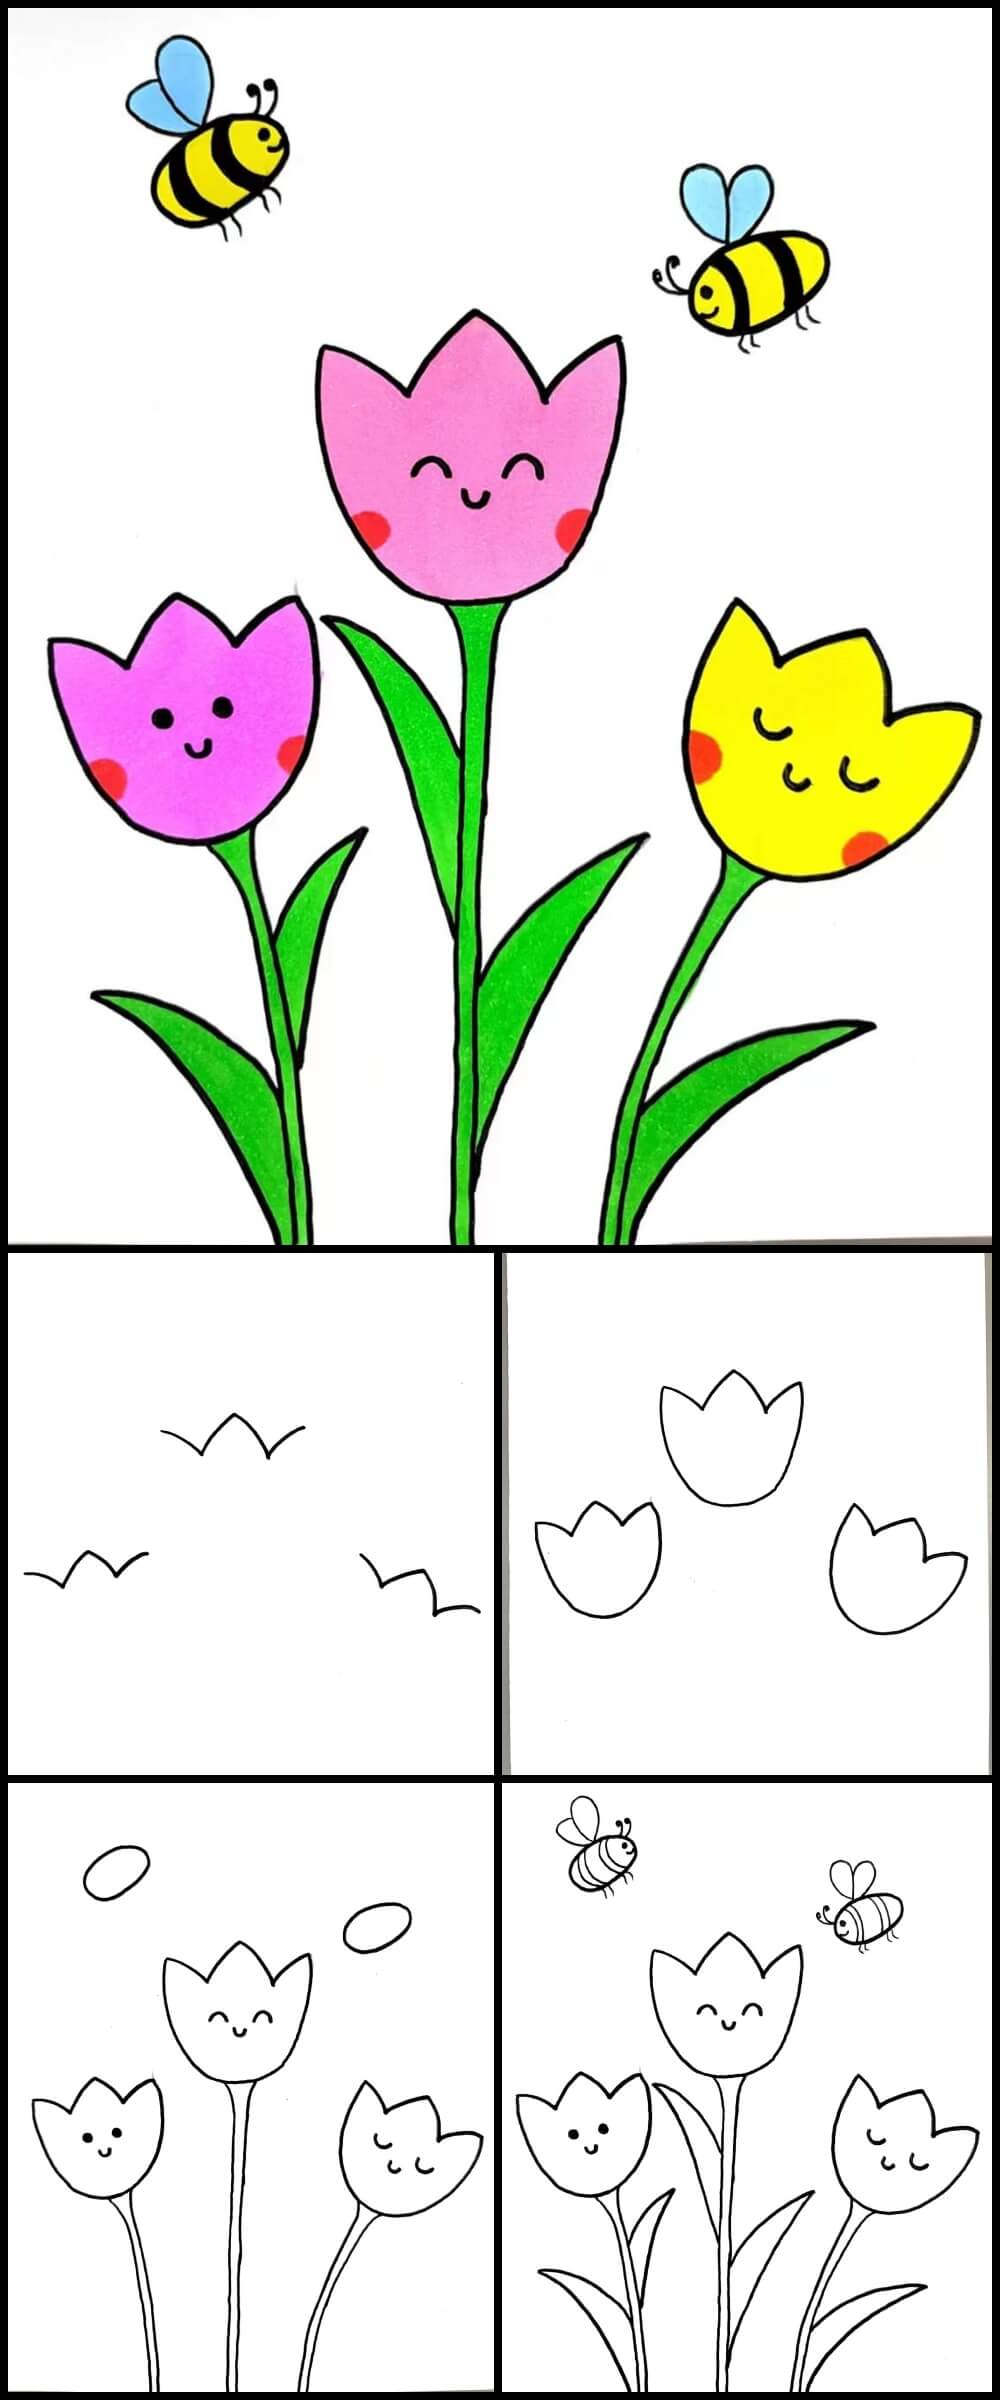
- First of all, we will make a big rectangular box on paper with the help of a scale.
- Now in that box, we will make one big and four small boxes.
- Now in a small box, first of all we will make three “A” with the help of HB pen.
- Now, joining both the sides of those A at the bottom with “A”, we will make a “V”. In this way, our first step is ready.
- After this, we move towards our second step. For this, we will repeat the first step in the second box.
- Then we will join the upper parts of both the sides of those “V” with the help of “U”. Thus our second step is ready.
- Now moving forward, let us move on to the third step. For this, we will first repeat the second step completely in the third box.
- After this, we will see something like a flower. Now, at the bottom of that flower, we will make two long sticks of equal size. In the middle flower, we will make straight and slanting sticks on the right and left side as you can see in the picture.
- Now, we will make two small oval shaped circles on the right and left side above the middle flower.
- Now, to make these flowers a little attractive, we will make two eyes and a nose in the middle of them. Due to which children will be attracted towards it and will try to make it and their mind will be attracted towards drawing. And in this way, our third step is ready.
- Now, moving forward, we will complete the fourth step. For this, first of all we will repeat the third step completely, then after that we will make two long thin leaves on both sides of the sticks that we had made, one on the top and the other on the bottom.
- After that we will make two small wings on top of the two oval circles that we had made, joining them with each other.
- After that we will make two lines on each of those circles. As you can see in the picture.
- After that we will make an eye and a mouth on the front side of those circles.
- After that we will make four legs on the bottom side and two pollens on the mouth side of those circles.
- In this way you can see that our fly is ready and our fourth step is also ready.

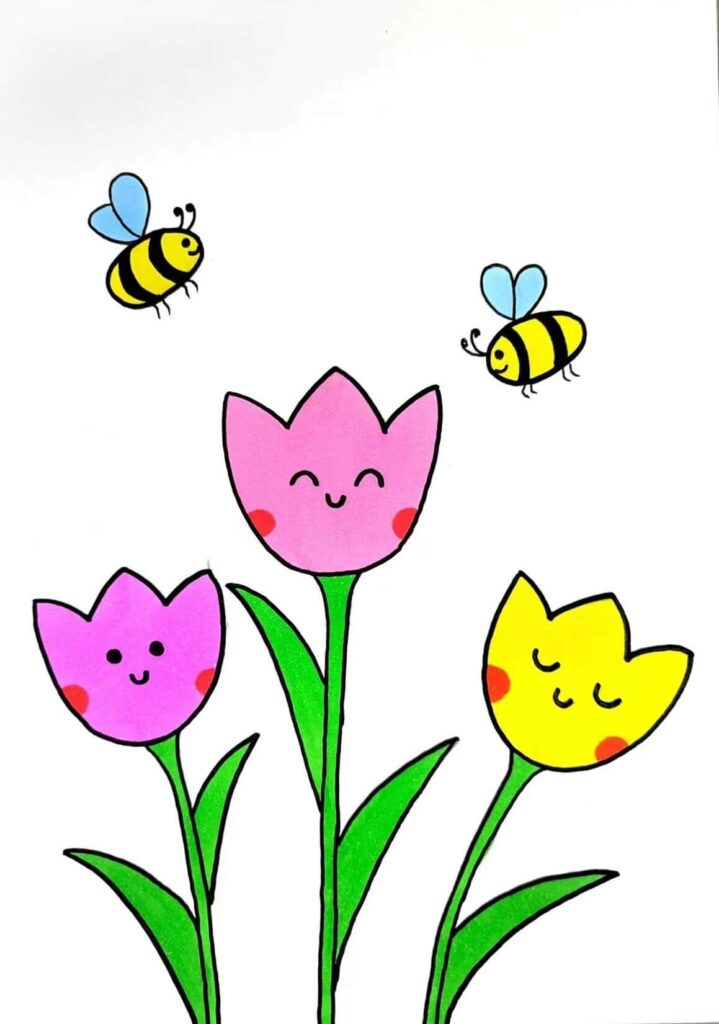
- Now finally we move towards our fifth and last step. In which we will fill colors in our prepared flowers and fly.
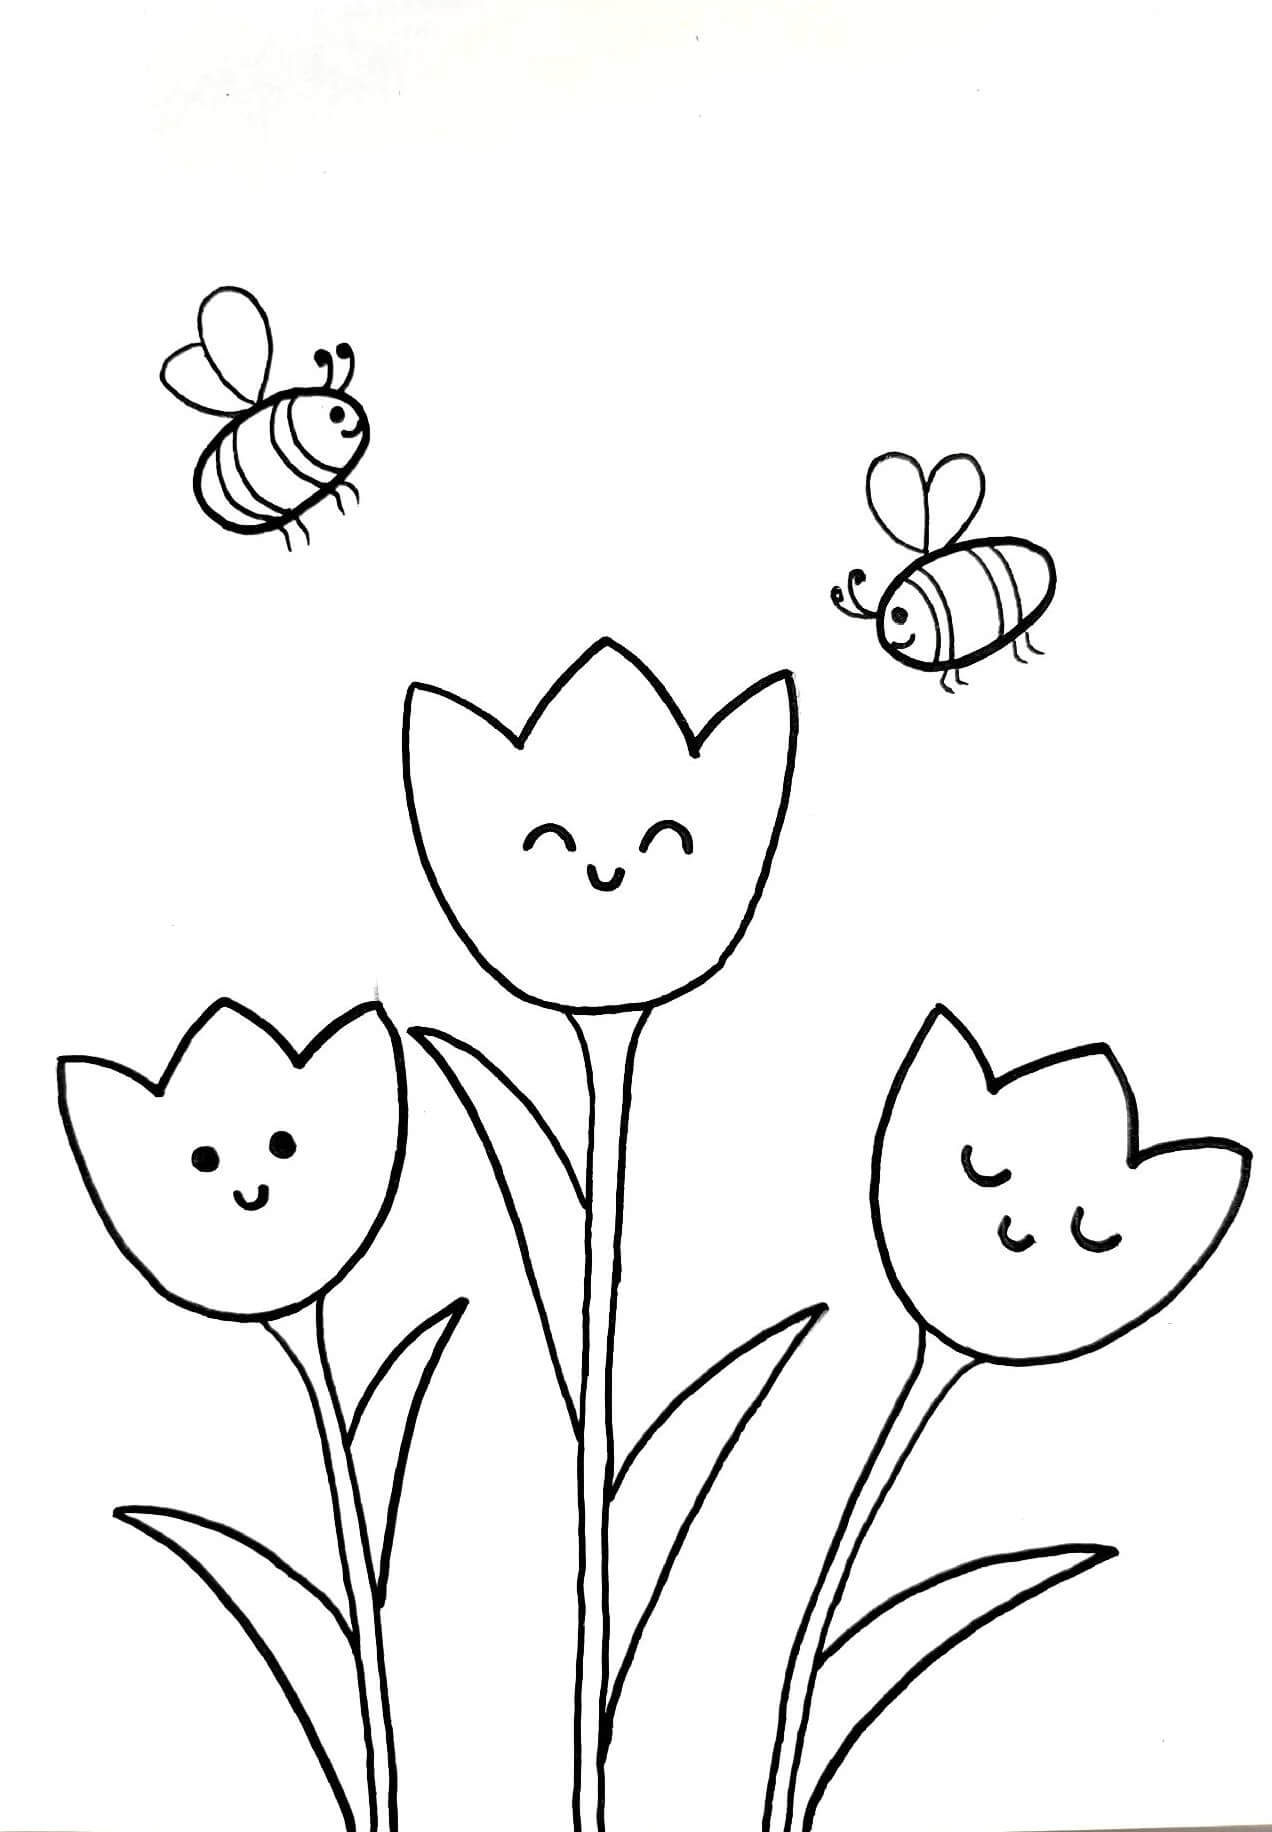
- To fill colors, we will first use black pencil. With this we will make the outline of all the flowers and flies. Keep in mind that we have to do this work very carefully.
- Now we will fill the left and middle flower completely from inside with pink water color.
- Now we will fill the right side flower with yellow water color.
- Now we will fill the sticks with green water color.
- After that we will fill the fly with yellow water color and its inner lines with black color.
- After that we will fill the wings of the fly with sky blue color and complete its eyes and legs with black color.
- Now finally we will fill the eyes of the flowers with black color and the nose with black color. And we will color the cheeks red. As you can see in the picture.
- In this way our tulip drawing is ready. So you see how beautiful the drawing is. And how easy it is to make it.
- We will do this work very slowly and carefully. So that our drawing does not get spoiled. And children should not face any harm. We should do this work under the supervision of our guardian and after this we should wash our hands thoroughly so that no colour remains on our hands.
Show Comments